
Exploring the World of Pillars of Eternity II: Deadfire for PC
In immersive role-playing games (RPGs), “Pillars of Eternity II: Deadfire” for PC is a monumental masterpiece. This article delves deep into the intricacies and nuances of this captivating game, shedding light on its gameplay mechanics, storyline, and why it should be your next gaming adventure.
Unveiling the Game Mechanics
“Pillars of Eternity II: Deadfire” transports players to a meticulously crafted world filled with rich storytelling and intricate gameplay. At its core, this isometric RPG boasts a real-time combat system interwoven with the strategic pausing of battles, allowing players to fine-tune their tactics and reactions. This unique blend offers a gaming experience that caters to both hardcore RPG enthusiasts and newcomers to the genre.
Character Creation and Development
The game offers an unparalleled level of character customization. Players can meticulously tailor their characters, choosing from many races, classes, and abilities. The choices made during character creation significantly impact the gameplay experience, adding layers of depth to your journey in the Deadfire Archipelago.
Engaging in Epic Battles
Combat in “Pillars of Eternity II: Deadfire” is a delicate dance of strategy and skill. With a party-based system, players assemble a diverse group of companions, each with unique strengths and weaknesses. The tactical depth of combat encourages experimentation, making each encounter a thrilling and rewarding experience.
The Riveting Narrative
One of the game’s most captivating features is its storytelling prowess. The narrative is woven with intricate subplots, engaging quests, and memorable characters that leave a lasting impression on players. The game’s rich lore and well-crafted dialogue contribute to its undeniable charm.
Navigating the Deadfire Archipelago
As the protagonist, players embark on a high-stakes adventure to hunt down a rogue god amidst the Deadfire Archipelago. The branching storyline empowers players with choices that carry weight, ultimately shaping the outcome of their journey. This dynamic narrative approach ensures replayability, as players must explore various story arcs.
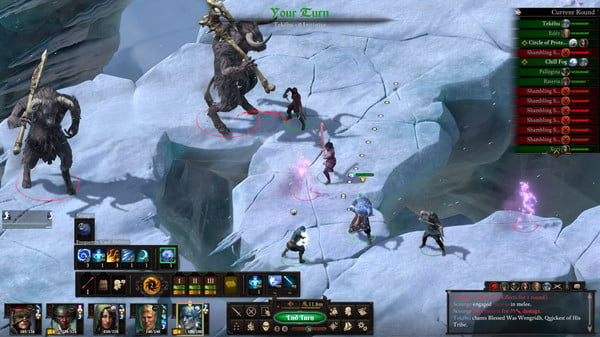
Visual Splendor
A picture is worth a thousand words, and in the case of “Pillars of Eternity II: Deadfire,” this adage holds. The game boasts stunning visuals that bring Eora’s vibrant and diverse world to life. Every location is meticulously designed, from lush jungles to intricate cityscapes, immersing players in a visually striking world.
Red Dead Redemption 2 System Requirement
Before embarking on this epic journey, ensuring your PC meets Red Dead Redemption 2 System Requirements is important. Red Dead Redemption 2 Size requires critical hardware to deliver the stunning graphics and gameplay it promises. Be ready to use your toys to their full potential.
Minimum Requirements
- Processor: Intel Core i5-2500K / AMD FX-6300
- Memory: 8 GB RAM
- Graphics: NVIDIA GeForce GTX 770 2GB / AMD Radeon R9 280 3GB
- Storage: 150 GB free space
- OS: Windows 7/8/10 (64-bit).
Recommended Requirements
- Processor: Intel Core i7-4770K / AMD Ryzen 5 1500X
- Memory: 12 GB RAM
- Graphics: NVIDIA GeForce GTX 1060 6GB / AMD Radeon RX 480 4GB
- Storage: 150 GB free space
- OS: Windows 10 (64-bit).
Conclusion
In conclusion, “Pillars of Eternity II: Deadfire” for PC is a gaming gem with hours of immersive gameplay, unforgettable storytelling, and stunning visuals. With its intricate game mechanics, engaging narrative, and breathtaking graphics, it undoubtedly deserves a spot in your gaming library. Dive into the Deadfire Archipelago and embark on an epic adventure that will keep you captivated from start to finish. Don’t miss out on this RPG masterpiece that deserves to be at the top of your gaming wishlist.